
Technology
How to transcribe text with AI for free

Long before AI was used to generate videos and code programs, it was used to understand and take action on spoken language. AI is the reason you can chat with Alexa, Siri, and Google Assistant and make these apps do what you want.
These same algorithms can help you create digital transcriptions of audio files that contain speech, whether these files are meetings, interviews, lectures, or just voice notes you’ve recorded for yourself. Transcripts give you a written record of what was said and are easily searchable.
Big name transcription services such as Rev And Happy writer only offers a limited amount of free transcriptions, but you can get the job done without paying anything thanks to Whisper. This is the speech-to-text engine developed by OpenAI (of ChatGPT fame), and there are no restrictions on its use.
You have the choice of using a web version of the hosted app at Cuddle Face, which is convenient but often busy during peak hours. You can also choose to install the software locally on Windows. This means faster transcriptions, but you’ll need a decent PC to handle the AI processing demands.
Whisper on the Internet
Go to Whisper on hugging face, and you can have the audio transcribed right in your browser for free. You don’t even need to register for an account. You have the option to upload an audio file from your computer, or you can record voice directly into the app if you have a microphone connected. Please note that your audio can be used to further train future AI models. As is often the case, OpenAI and Hugging Face’s privacy policies are not clear about this.
To upload and process an audio file:
- Open the Sound file tab.
- To elect Click to upload.
- Select an audio file.
- Check the Transcribe box.
- Click Submit.
After a few moments (or more), you will see the text output on the right side of the screen. Processing times vary depending on the length of your audio file and how busy the Hugging Face servers are. Since this is a free service open to everyone, it is also very popular, so you may have to wait a while for the files to get through the queue.
Within the interface you will find a number of useful tools. For example, click the little pen icon just above the audio playback bar and you can trim the beginning and end of the clip – useful if you want to remove silences or unimportant parts of the audio.
You can also switch to the Microphone tab to record some audio directly into the Whisper interface, or switch to the YouTube tab and receive transcripts of each video. Just paste in the video URL and you are good to go. It’s worth noting that YouTube already automatically adds transcripts to some videos, which you can find in the comments sections.
Whisper on Windows
If you experience a lot of lag in the Whisper web app, or if you want to keep your transcription processing more local and private, you can set up the AI model on a Windows computer. You need a CUDA capable graphics card (see here for a list), with at least 4 GB of VRAM, to handle the processing. If you have a fairly recent Nvidia card installed, it probably qualifies.
This process is much more complicated and doesn’t offer many user interfaces, so it’s not for everyone. However, it does have the benefits we’ve already mentioned, and you don’t have to stand in line waiting for your files to be processed. It’s also a fun little project if you like tinkering with code and programs.
Assuming your computer meets the rating, you’ll need to install a few bits on your computer: Python for the encryption (make sure Add python.exe to PATH is checked during installation), PyTorch for the machine learning libraries, Chocolatey for managing software packages, and FFmpeg for audio processing. They all come with installation instructions on the relevant websites, if you need them.
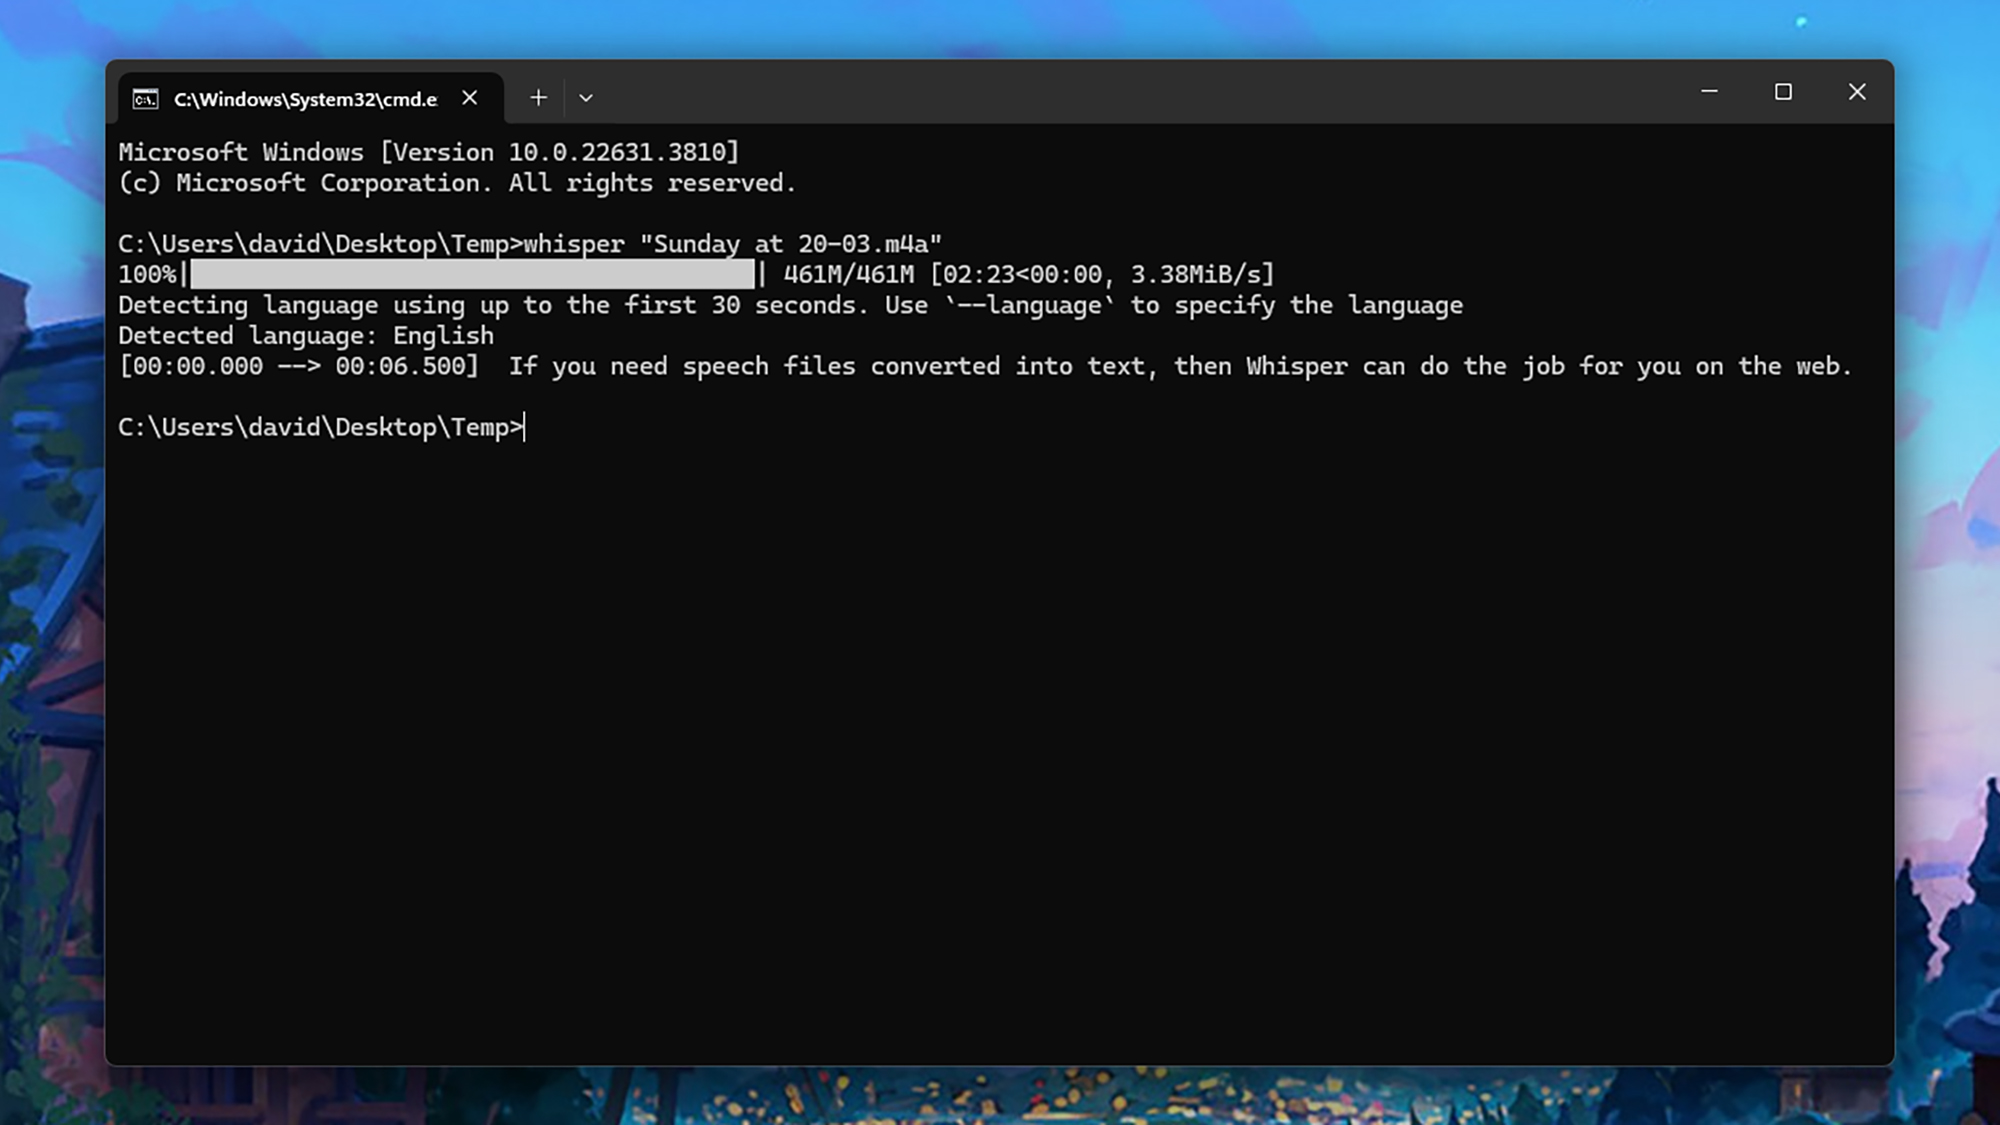
You are then ready to install Whisper yourself: Search for “cmd” in the Start menu and open Command Promptthen type “pip install -U openai-whisper” and press Enter. When the installation is complete, you can transcribe the following files:
- Open the folder containing your audio files in File Explorer.
- Click on the address bar at the top, type “cmd” and press Enter.
- Type ‘whisper’, then a space, then the name of your audio file.
- Hit Enter again, and processing begins.
The text is displayed on the screen and saved as a series of text files in the same folder as the audio. If you need to convert multiple files at the same time, list them all after the ‘whisper’ command, separating each one with a space.
Even if you’re not familiar with Python or the command prompt, you shouldn’t have too much trouble getting everything up and running. There are plenty of guides online that can help you if you need help. This is one of the best tutorials out there, taking you step by step through each stage and explaining some of the advanced features available to you (such as switching to a different AI model).